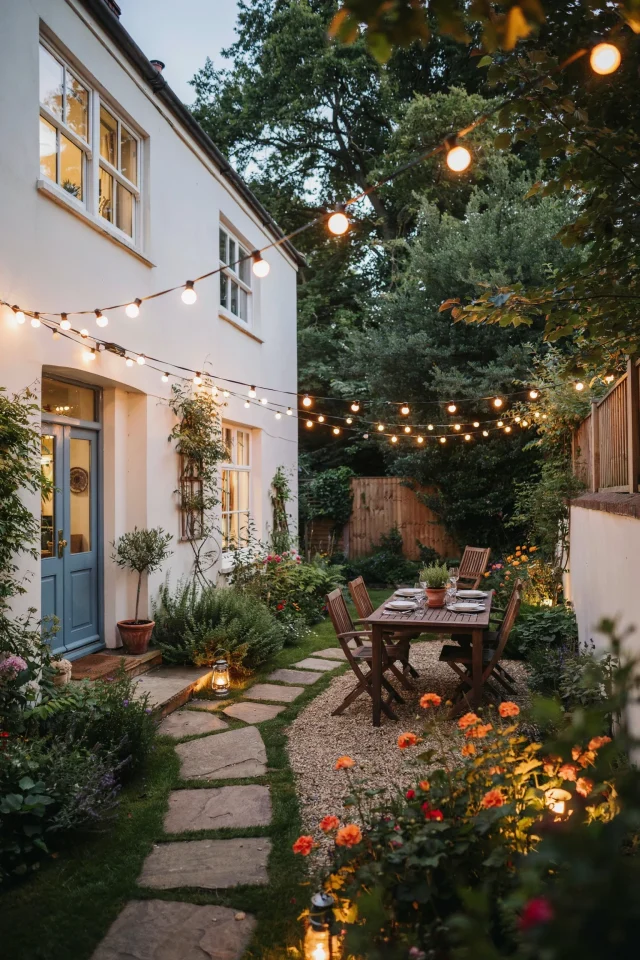
Lay Out a Herringbone Patio Pattern for Maximum Impact
If you have a tiny paved backyard, the pattern of your stones does a lot of the heavy lifting. A herringbone layout makes a small area feel larger because your eye moves diagonally instead of stopping at straight lines. I have seen this trick work wonders on a 10×10 foot space outside a rental house. You do not need expensive materials either. Standard rectangular concrete pavers from a big box store cost about $0.50 each, and a herringbone pattern hides minor cutting mistakes better than a running bond does.
Start by laying a dry run of pavers on a sand base. This lets you adjust the angle without committing to mortar. For a really tight budget, look for “seconds” or slightly chipped pavers at landscaping supply yards. You can hide the chipped edges along the perimeter or face them toward the wall. The contrast between the angled bricks and the surrounding grass or gravel creates a focal point that distracts from the small size of the space.
Create a Cozy Seating Nook with a Tiny Paver Platform
You do not need a full patio to have a place to sit. A simple paver platform just large enough for two chairs and a side table can transform a corner of your yard. I built one for about $80 using 18×18 inch concrete squares and a bag of paver base. The key is to keep the platform flush with the grass so it looks intentional rather than floating. Use a level and a rubber mallet to tap each paver down until the surface is even.
Once the platform is set, add a couple of outdoor cushions and a small galvanized bucket as a side table. The rest of the space stays open, which makes the whole yard feel bigger. If you want a softer look, leave a few inches between the pavers and plant creeping thyme or moss. The plants will fill in over time and soften the hard edges without requiring any extra work.
Use Contrasting Paver Colors to Define Zones
In a compact backyard, defining zones makes the space feel organized rather than cramped. You can achieve this with two colors of pavers without spending extra money. For example, use charcoal gray pavers for the main seating area and warm terracotta or buff pavers for a path leading to the grill or garden. The color change tricks the eye into thinking there are separate rooms outside.
I have done this with leftover bricks from a neighbor’s construction project. Mixing colors also hides stains and weathering. If you are on a strict budget, paint a few pavers with concrete stain instead of buying different colors. A quart of stain costs about $15 and covers 20 to 30 pavers. Just seal them afterward so the color lasts through rain and foot traffic.
- Zone 1 (seating): Dark gray or bluestone colored pavers for a grounded feel.
- Zone 2 (path): Light beige or warm brown pavers to guide the eye.
- Zone 3 (planters or grill): A third accent color like deep red or charcoal.
Keep the transitions simple. A single row of contrasting pavers between zones is enough. Overdoing it makes the space look busy, which is the opposite of what you want in a small backyard.
Build a Low Cost Paver Path That Connects Your Garden
A winding paver path can make a tiny yard feel longer and more deliberate. Instead of laying a solid rectangle of pavers, space them out with gaps for gravel or ground cover. This uses fewer pavers, which saves money. I once made a 20 foot path with only 30 stepping stones spaced about two feet apart. The rest of the path was filled with decomposed granite, which costs around $40 for a half ton.
Start by marking the curve with a garden hose. Dig down about three inches, add a layer of crushed rock, and tamp it flat. Set the pavers, then fill the gaps with the granite. The key is to make the path wide enough for one person comfortably, about two feet across. This width feels intimate and encourages slow walking, which is perfect for a small space where you want to savor every corner.
You can also mix pavers with salvaged brick or broken concrete pieces. Just make sure the tops are level enough to walk on without tripping. A slight offset in height adds character, but more than a half inch difference becomes a hazard.
Add Vertical Interest Without Taking Up Floor Space
When your paved area is small, the vertical plane becomes your best friend. Attach a simple wooden lattice panel to a fence and train climbing plants up it. This draws the eye upward and makes the backyard feel bigger. You do not need expensive planters either. I used galvanized buckets from a dollar store and drilled drainage holes in the bottom. For less than $30, I had a green wall that softened the hardscape.
Another trick is to hang a mirror on a shaded wall. Choose a mirror with a frame that matches your paver color, but keep it away from direct sunlight to avoid cracking the seal. A 24 inch round mirror reflects the sky and doubles the visual depth of the patio. If mirrors are not your style, install a tiered shelf unit made from reclaimed pallet wood. Place small potted succulents or herbs on each level. The shelves keep plants off the paved floor, leaving more room for chairs or a tiny fire pit.
Incorporate Budget Friendly Stepping Stones with Ground Cover
Stepping stones are the most affordable way to add paving without committing to a full patio. You can buy square concrete stepping stones for $2 each at most home improvement stores. Space them in a random layout, leaving six to eight inches between them. Then plant low growing ground cover like creeping Jenny or Irish moss in the gaps. The plants will knit together and soften the hard edges over a single growing season.
This approach works especially well for a side yard or a narrow strip along the house. The stepping stones guide foot traffic and prevent mud, while the ground cover keeps the soil from washing away. I prefer irregular spacing rather than a grid because it looks more natural in a small space. If you want a slightly more polished look, use flagstone pieces instead of squares. Flagstone is often sold as irregular remnants at a discount, sometimes as low as $1 per piece.
Seal the stones with a clear concrete sealer every two years to prevent cracking and staining. This is a cheap step that saves you from replacing broken stones later.
Finish with Soft Lighting and Minimal Decor
Lighting can make or break your small paved backyard. Solar path lights are inexpensive, but most of them look cheap. Instead, try string lights hung in a zigzag pattern across the space. A single strand of 50 lights costs about $12 and transforms the whole mood. Wrap the string around fence posts or attach it to hooks on the house. The warm glow bounces off the pavers and creates a cozy atmosphere without taking up any floor space.
For decor, keep it simple. One small planter with a trailing plant and a single lantern is enough. Too many objects clutter the visual field and make the paved area feel crowded. I learned this the hard way when I filled my first small patio with five mismatched pots and a bird bath. It looked like a yard sale. Now I stick to one focal point, either a colorful cushion or a unique planter, and let the paver pattern carry the rest.
You can also paint a faded wall or fence behind the pavers. A coat of light gray or pale green paint costs less than $30 and instantly updates the entire space. The color contrast makes the pavers pop and ties the whole design together. Do not use white because it shows dirt too quickly. Stick to earthy tones that blend with the stone.
Small paved backyards do not need a huge budget to look intentional and inviting. Focus on one area at a time, reuse materials when you can, and remember that a few thoughtful details go further than a pile of expensive stuff. I have seen 8×10 foot patios with a herringbone pattern, a couple of chairs, and a string light become someone’s favorite spot in the house. Yours can too.
Have you tried any of these ideas in your own space? Share your small paved backyard ideas in the comments. I always love to see what people create with a little concrete and a lot of imagination.
#SmallPavedBackyardIdeas #PatioAesthetic #CreativeOutdoorDesign #SmallSpacePatio #BackyardTransformation
Leave a Comment