Planning a Small Bathroom Layout That Actually Works
When I started my own bathroom renovation, the biggest challenge was squeezing a full suite of fixtures into a room that measured barely 5 by 8 feet. I had poured over dozens of modernbathroomdesign ideas online, but most looked staged and impractical. What I learned after two months of demolition and drywall is that a small space requires ruthless prioritization. You cannot have a freestanding tub, a double vanity, and a separate shower unless you are willing to sacrifice legroom entirely.
I decided to swap out the old tub for a curbless walk-in shower with a linear drain. That single change freed up floor space visually and physically. The shower area now feels open because there is no bulky door or threshold. I also moved the toilet to the far corner behind a pocket door, which gave me an uninterrupted wall for the vanity. If you are planning a small bathroom, start by measuring your actual clearances (not just room dimensions) and map out every inch of circulation space.
- Measure door swing radius and allow for toe space at fixtures.
- Consider a wall-hung toilet to create the illusion of more floor area.
- Use a pocket or sliding door instead of a standard hinged door.
- Position the shower head opposite the entry to avoid splashing into the room.
Choosing a Minimalist Vanity Without Sacrificing Storage
My second lesson was about vanity design. I wanted a floating unit because it makes the floor feel continuous and easy to clean. But a floating vanity often means less storage because the cabinet depth is shallow. I solved this by custom-building a 48-inch wide unit with soft-close drawers that pull out fully. The drawers hold toiletries, cleaning supplies, and even a hair dryer without clutter.
What I recommend is going for a minimalist vanity that has a single large slab of quartz or marble on top with an integrated basin. This eliminates the seam between counter and sink, which reduces grime buildup. Avoid vessel sinks in a small space; they take up counter real estate and make the room feel crowded. Instead, use a rectangular undermount sink that fits flush with the countertop. Pair it with a wall-mounted faucet to free up even more surface area.
Another trick: install a mirrored medicine cabinet that is recessed into the wall. It does not protrude into the room, yet it stores everything from razors to backup toothpaste. This single change made my bathroom feel twice as spacious because I no longer had a bulky cabinet jutting out above the toilet.
Making a Statement With Tile Without Overwhelming the Room
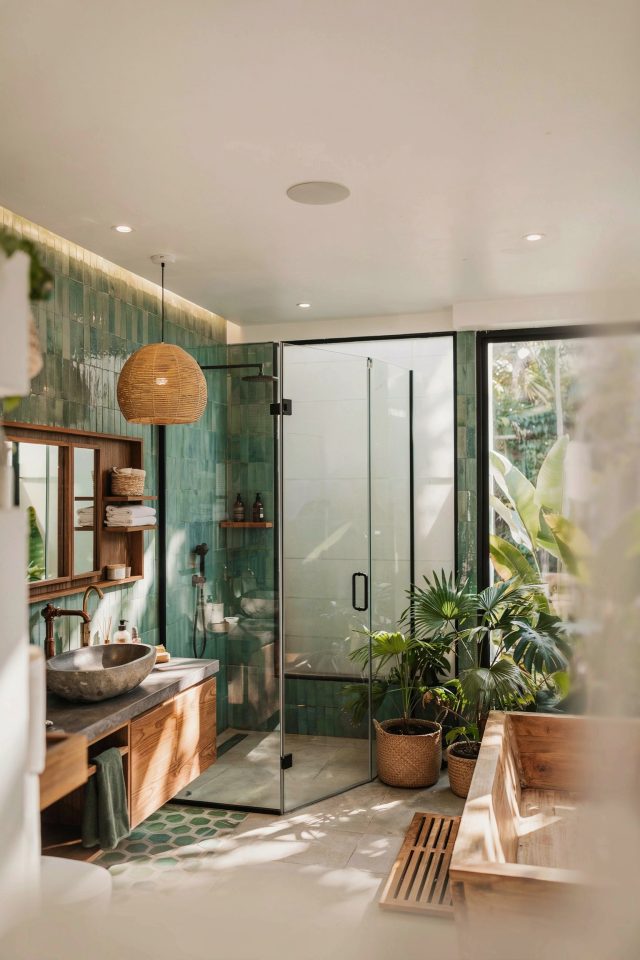
I was nervous about using bold tile in a small bathroom. Many design blogs say to keep everything neutral, but I wanted personality. My compromise was to use a large-format matte white tile on the walls (12×24 inches) with a single accent wall behind the vanity made of handmade zellige tiles in a soft sage green. The glossy, irregular finish catches light differently throughout the day and adds texture without making the space feel busy.
For the shower floor, I chose small penny rounds in a charcoal gray. They provide grip and hide water spots, but more importantly they create a visual break between the wall and floor. If you want a statement floor but are worried about clashing, pick a tile that shares a color with your accent wall. That way the eye moves smoothly from one surface to the next. I also used a continuous tile layout across the shower wall and into the room to blur the boundary between wet and dry zones.
One practical tip: avoid busy mosaic patterns on large surfaces in a tiny bathroom. They can make the walls feel like they are vibrating. Instead, reserve pattern for a narrow band, a niche, or the floor only. Let the rest of the tile be calm so the accent can breathe.
Lighting That Makes a Small Bathroom Feel Larger and Softer
Lighting is where many small bathroom designs fall flat. Recessed ceiling cans alone create harsh shadows on your face and make the room feel like a interrogation room. I layered three types of light: warm LED strip lighting under the floating vanity, a dimmable sconce on each side of the mirror, and a small flush-mount fixture in the center of the ceiling for general illumination.
The sconces are the most important. I chose ones with a white opal glass shade that diffuses light evenly. Avoid placing a single light fixture above the mirror; it casts unflattering shadows under your chin. Side lighting at eye level is far more functional for shaving or applying makeup. I also added a waterproof LED strip behind a frosted glass shelf in the shower niche. It gives the shower a warm glow that feels like a spa without requiring extra electrical work.
One more light trick: use a mirror with a built-in LED frame. This backlight eliminates the need for a separate vanity light and creates a soft halo effect that visually expands the wall. My mirror has a memory function that remembers my preferred brightness level, so I never fumble with switches first thing in the morning.
Smart Storage Solutions for Towels, Toiletries, and Linen
Storage in a small bathroom is not about adding more cabinets, it is about using every hidden gap. I installed a recessed shelf between the shower wall studs to hold shampoo bottles without a caddy. On the back of the bathroom door, I hung a slim over-door rack that holds six rolled towels. That single addition freed up the entire shelf under the sink for cleaning products.
I also used vertical space near the toilet by mounting a narrow pull-out cabinet that fits between the toilet tank and the wall. It is only 6 inches deep but holds toilet paper rolls, a plunger, and spare soaps. Consider magnetic strips on the inside of vanity cabinet doors to store tweezers, scissors, and nail clippers. These small organizers prevent clutter from building up on the counter.
One mistake I made early on: buying a standard towel bar that stuck out too far. It hit my hip every time I walked past. I replaced it with a fold-down hook that stays flat against the wall when not in use. For bath mats, I switched to a thin absorbent stone mat that dries quickly and does not create a tripping hazard.
Fixtures and Hardware That Unify the Minimalist Look
After selecting tile and vanity, I chose all hardware in a single finish: brushed nickel. I find it warmer than chrome and more modern than matte black (which shows every water spot). I used the same finish for the faucet, shower head, toilet lever, towel ring, and cabinet pulls. This consistency makes the room feel curated rather than random. If you cannot replace everything at once, start with the faucet because it is the most used piece and will set the tone.
For the shower, I picked a rain shower head with a separate handheld spray. The rain head is mounted on an offset arm so it hangs directly over the center of the shower area rather than the wall. The handheld is great for rinsing the shower walls and washing pets. I also installed a thermostatic valve that keeps water temperature steady, which is a luxury I never knew I needed.
Think about the toilet flush plate too. A standard lever looks cheap. I swapped mine for a rectangular push-button plate in brushed nickel that matches the rest of the fixtures. Small details like this matter because they are touched every single day. A cohesive hardware palette makes a small bathroom feel intentionally designed, not thrown together.
Final Touches That Bring Warmth Without Clutter
The last step in my renovation was adding elements that soften the clean lines without filling the space with knickknacks. I placed a single terracotta pot with a small snake plant on the vanity counter. It adds life and a touch of organic shape against the straight geometry. I also hung a large round mirror instead of a rectangular one; the curve breaks up all the right angles in the room.
For window treatments, I installed a top-down bottom-up cellular shade in a light linen color. This lets in natural light while maintaining privacy. In the evening, the shade glows softly. Avoid heavy curtains in a small bathroom; they collect moisture and dust.
One more small but impactful addition: a heated towel rack. I wired it into the wall next to the shower. It is slim and does not protrude far, but it dries towels quickly and adds a bit of luxury during cold mornings. That simple upgrade cost about 200 dollars but has changed how I feel about stepping out of the shower.
Every choice I made came back to the question: does this help the room feel larger and calmer? If the answer was no, I left it out. The result is a bathroom that is both beautiful and genuinely easy to live in. You can achieve the same balance by focusing on what you truly need and eliminating the rest.
If you are planning your own renovation, start with the layout and fixtures before picking finishes. That order saves you from falling in love with a vanity that will not fit or a tile that clashes with your shower door. Take your time measuring and mocking up paper templates on the floor. It is tedious, but it prevents expensive mistakes.
I hope these ideas give you a solid starting point for your own small bathroom project. Every space is different, but the principles of minimalism and function translate well no matter your dimensions. Save this post or pin it for later when you need a quick reminder that good design is about subtraction as much as addition.
#modernbathroomdesign #bathroomdecor #bathroomrenovation #minimalistbathroom #smallbathroomideas
Leave a Comment