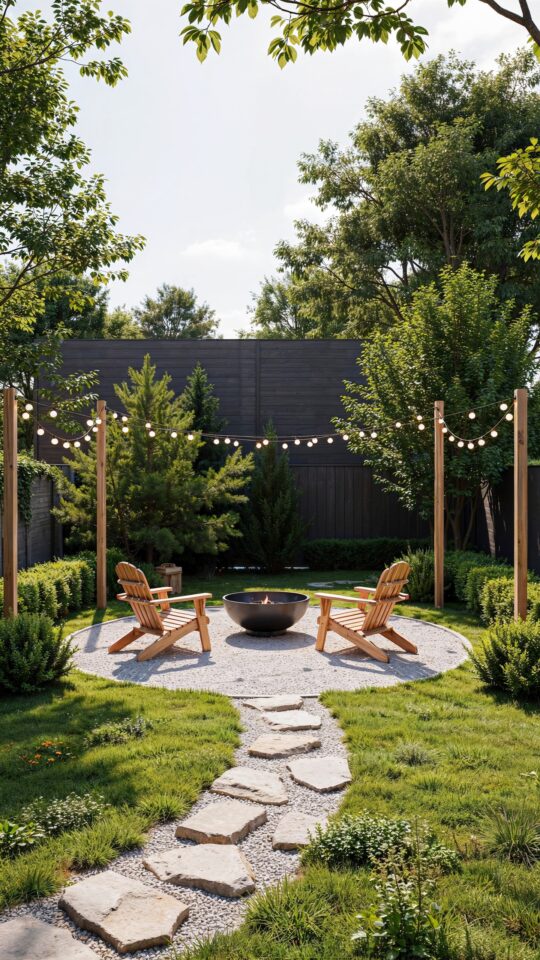
Why I Ditched Flimsy Light Stands for Concrete Planters
I had been fighting with cheap metal poles and wobbly light stands for two summers before I finally built my own Fire Pit String Light Poles DIY project. Every time we had people over, someone would knock into a stand, and the whole string would swing or fall. That was the moment I decided to make something that would stay put, look good, and double as a planter. The solution turned out to be simple: concrete planters with wooden posts anchored inside. This guide walks you through exactly how I built them, what I learned along the way, and how you can copy the setup for your own backyard.
Planning the Layout for Your DIY Planter Light Posts
Before I bought a single board or bag of concrete, I figured out where the string lights needed to go. I measured my fire pit area and the distance from the house to the pit. I wanted the lights to form a gentle rectangle around the seating area, so I needed four posts, each placed about 8 feet apart.
Here is what I considered in my planning:
- Post height: I went with 8 feet above the planter. That gave me enough clearance for people to walk under the string lights without ducking.
- Planter size: 18 inch wide planters gave enough room for the post and 80 pounds of concrete. Smaller ones might tip.
- String light length: I bought a 48 foot string, which fit the rectangle with a little slack.
- Sun exposure: I placed the planters where they would get morning sun but be shaded by late afternoon, so the concrete would not bake the plants.
Take an hour to walk your yard and mark post locations with stakes. It saves a lot of frustration later.
Materials and Tools You Need for Backyard Patio Decor
I kept the material list simple and budget friendly. Everything came from a standard home improvement store. Here is what I used for four posts:
- Four 4×4 pressure treated posts, 10 feet long
- Four large plastic planters (18 inch diameter, 15 inches deep)
- Five 60 pound bags of concrete mix (this was enough for all four planters)
- One 4 foot level
- A post hole digger or a shovel (I just used a shovel)
- Wood screws and a drill
- Outdoor wood stain and a brush
- Gravel for drainage (optional, but I used it)
- Potting soil and plants of your choice
I spent about $90 total, not counting the string lights or plants. That is cheap compared to buying pre made light poles.
Step by Step: How to Secure Posts in Concrete Planters
This is the part where I learned the hard way. The first planter I made, I just poured concrete around the post in the planter and called it done. Two days later the post was leaning because I had not braced it while the concrete cured. So here is the exact process that actually worked for me.
Prep the Planters and Posts
Drill two small holes about 2 inches up from the bottom of each planter for drainage. Then cut your posts to the desired height. I left mine at 10 feet because I wanted 8 feet above the planter, and about 2 feet would be buried in concrete. Set the post in the middle of the planter and check that it is straight. I used two scrap 2×4 boards clamped to the post and the planter rim to hold it upright. That brace stays on for at least 48 hours.
Mix and Pour the Concrete
I used a fast setting concrete mix so I did not have to wait a week. Follow the bag directions for water ratio. The mixture should be thick like oatmeal, not soupy. Pour it into the planter around the post, filling until it is about 2 inches from the top. Tap the sides of the planter with a rubber mallet to release air bubbles. Then let it set for 24 hours before you remove the braces. After that, wait another 24 hours before moving the planter.
A common mistake is to fill the planter all the way to the rim with concrete. Leave that top gap for soil and plants. The concrete acts as a dead weight anchor, and the top layer of soil hides the concrete and looks way better.
Wiring Your Fire Pit String Lights Without a Big Mess
Once the posts were solid, I installed the string lights. I used outdoor rated string lights with S14 bulbs. I stapled the wire to the top of each post using plastic coated cable staples, making sure not to pinch the wire. Run the string from post to post, leaving some slack so the lights do not pull tight in wind.
For the end post near the house, I plugged the string into an outdoor rated extension cord with a weatherproof cover. For the far post, I just let the tail end coil around the post and hang down, which looks intentional and gives you an extra outlet if needed later. I also used zip ties to keep the wire tidy against the post.
Choosing Plants That Thrive in Concrete Planters
Not every plant likes sitting on top of a heavy concrete base. The concrete acts like a heat sink in summer, so the soil can get warm. I chose drought tolerant plants that do not mind a little extra heat: rosemary
#FirePitStringLights #DIYLighthPoles #PlanterLightPosts #BackyardPatioDecor #OutdoorLightingDIY
Leave a Comment